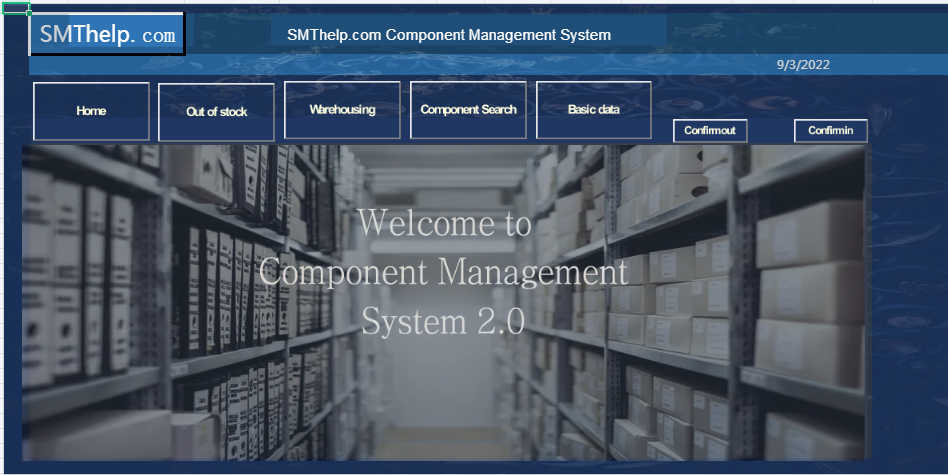
1. Home: The following figure shows the main interface of material management system. Click the “Home” button to return to this interface.
2. Out of stock:
2.1 Click the “out of stock” button after the system automatically opens the “component selection interface”. In the component selection interface, you can generally search based on the component code, all the material information will be displayed after clicking the “search” button.
2.2 Double-click the material in the “component selection interface” to automatically add the material to the “out of stock” form.
2.3 In the component selection interface, you can generally search by inputting the component code.
2.4 After searching, you can click “select all” button to add the searched materials to the material out-of-stock list, or double-click a single data to add.
2.5 Click the “clear all” button to clear all the contents of the component out-of-stock table, and click the “exit” button to close the component selection interface.
2.6 Enter the quantity of all components to be taken out of stock in the location of “outbound quantity” and click the “confirm outbound” button.
2.6.1 When the quantity entered is greater than the quantity in stock, the system will automatically pop-up window to remind the quantity in stock is not enough for the material. Modify the outbound quantity and click “confirm outbound”.
2.6.2 After entering the outbound status, the “confirm warehousing” button of the system is automatically disabled to prevent the data from being recorded by mistake.
3. Warehousing
3.1 The system automatically opens the component selection interface after clicking the “warehousing” button, which is convenient to select the materials that need to be stored.
3.2 Component selection is the same as the component outbound as described above.
3.3 Enter the quantity to be stocked and click the “confirm warehousing” button.
3.4 The “confirm outbound” button is disabled after entering the component outbound status to prevent data from being recorded incorrectly by mistake.
4. Component search
4.1 Click “component search” button, the system will automatically enter the search interface.
4.2 Enter the component code in the component code input box to generally search the material code.
4.3 Click the “warning search” button to view all the materials with alert status.
4.4 After searching the material, if you double click the material in the search box, the corresponding material can be added to the list of purchase orders.
4.5 If you click the “select all” button, you can add the left and right contents of the search box to the list of purchase order. If you click the “clear all” button, you can delete all the materials in the purchase order list.
4.6 After clicking the “exit” button, the system automatically returns to the main screen and clears the purchase order. Click the “generate purchase order” button. The system will automatically generate the purchase order.
4.6.1 Generate Purchase Order: Click “generate purchase order” to automatically generate a purchase order, as shown in the following figure.

4.6.2 After entering the purchase quantity for the corresponding material, the system automatically calculates the amount and the total amount. The generated documents can be printed out directly.
4.7 Click the “back” button in the upper right corner of the purchase order to return to the main interface automatically.
5.Basic data
5.1 The system automatically opens the basic information maintenance interface after clicking the “basic data” button in the main interface.
5.2 After filling in the corresponding information in the basic data maintenance interface, you can enter new material information. If the material code entered is duplicated with the database, a pop-up window will automatically remind you.
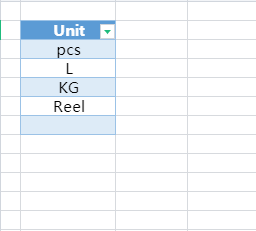
5.3 The unit information for entering information is a drop-down selection, and the drop-down information can be maintained in the “drop-down information” worksheet.
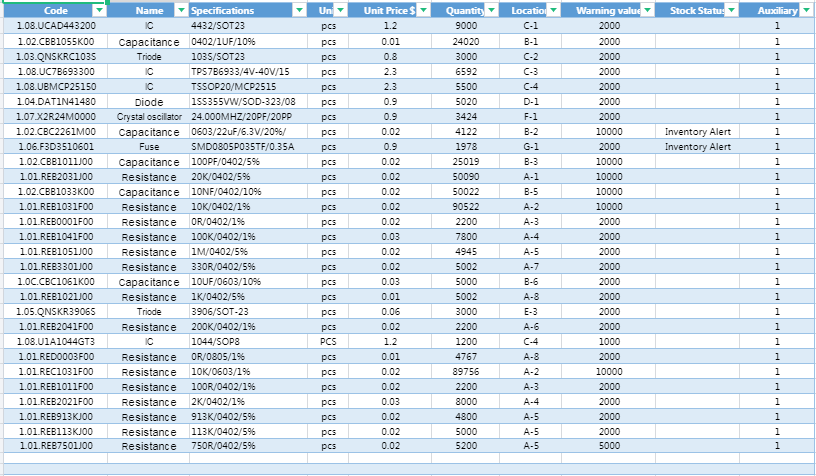
5.4 Inventory information: click the “view inventory” button to automatically open the inventory list window.
5.4.1 Double click the location in the inventory list to automatically enter the storage position information into the brake position.
5.4.2 If you re-click on another location, the original data is automatically replaced.
5.4.3 Click the “exit” button to close the interface of the inventory list.
5.4.4 The following figure shows the inventory list and drop-down selection information of the “drop-down information” worksheet.

5.5 Click the “enter” button after entering all the information to enter the information into the database. Click on the “exit” button to return to the main interface.